Monday, March 23, 2020

D,s Easy Apple Pie

D's Easy Apple Pie


5 apples (I used gala)

peeled, cored and sliced (thick slices)

1 cup granulated sugar
1/4 cup brown sugar
1 TBS. apple pie spice
1/4 cup cornstarch
1/2 stick of butter
1 tsp Salt.

  a sprinkle of salt and sugar for crust

Put all ingredients except butter into a 1-gallon ziplock bag.
Seal the bag and shake it well.
Set aside
Pre-heat oven to 375

Spray your favorite pie plate with cooking spray and line with your favorite pie crust recipe. My favorite recipe is Pilsbury pre-made refrigerated, roll-out crusts!

Grate 1/2 of the butter into the bottom crust and distribute evenly. Sprinkle granulated sugar and salt on the bottom of the crust. Add the apple mixture to the crust. Place the second crust over the top. You can seal your edges with a fork and cut off the excess but I prefer to roll the edges. It is not as pretty but my family loves the crust. Grate the remaining butter on to the top of the crust and sprinkle about a tablespoon of granulated sugar and a 1/2 teaspoon of salt on the top of the crust. Be sure to butter the edges of your crust well so the sugar and salt stick. Poke holes in the top with a knife or a fork.

Bake for 45 min. If your crust begins to get too brown you can add foil to the edge to cover it but it has been my experience that 45 minutes is perfect.

ENJOY!
let us know how it turns out!

Azaleas: A simple Guide for Happy Blooms

Azaleas
A Simple Guide for Happy Blooms


  Azaleas have been a long-time southern staple in most yards and landscapes. Most people recognize their abundant spring blooms even if they don’t know much about them. As the blooms fade and you are left with just an attractive shrub you may be longing for the color that was there in the not so distant past. 
It is these azaleas that are so lovingly planted in front of your grandmother’s house and are now blocking every window within 10 feet. Sadly these are also the ones that get dug up and discarded because of their over achievement in the growth department. Now, don’t get me wrong, these take many years to reach their full potential but the next generation is not amused when they inherit these beauties. Thankfully there are alternatives now that grow much smaller. Some actually as small as twelve inches at maturity. This gives you many more options when deciding where you want to plant.


   When considering azaleas for inclusion in your landscape there are many factors to contemplate. You want to be mindful of your space. Be sure to pay close attention to the growing habits of your selection. You don’t want to put an azalea in a corner area with tight spacing if its mature size is going to be 6 ft tall and 5 ft wide.  Lighting is also a huge consideration. If your area is full sun you may love one variety but that variety may not fare well. And you must always think about soil drainage. You definitely do not want to try to plant an azalea in a swampy area and likewise, you don’t want to try to get it to grow in a barren wasteland where even the grass has packed up and left the area. Within this article, we will try to make it easy and painless to decide what is best for your area to bring years of enjoyment and beauty. Hopefully, without it landing on the demolition list for the next generation.

 
 Deciduous azaleas are those that lose their leaves prior to the onset of winter. These are a good choice for areas that are prone to more extreme heat and are cold hardy in zones 4 through 9. While all azaleas do well in partial shade or filtered light, some deciduous varieties can tolerate more direct sunlight. Azaleas that are grown in full sun tend to grow just a bit smaller and their blooms will fade much faster. Generally, these azaleas only bloom one time per growing season.


 Re-blooming azaleas keep their foliage year-round.  Most of these varieties are hardy in zones 5 through 8. These will usually thrive in more sun. You can choose a Bloom-A-Thon or Encore variety and enjoy blooms two or three times within a growing season.


   The perfect location for your azalea will be one where the plant is sheltered from harsh winds, dappled light, and good drainage. Fall is the best time to plant your azalea. However, you can plant anytime during the colder months if the ground is not frozen. If your azalea is going into new ground, be sure to till or loosen the soil to a depth of about eighteen inches and add organic compost to the soil, taking care to mix it well. Poor drainage is a sure-fire way to kill your azalea since they have a shallow root system, you don’t want to smother them with heavy clay or too much mulch. Be sure to plant your azalea with the root ball one to two inches above the ground level. Backfill the hole with loose amended soil.  You will want to finish off your planting with a light layer of mulch. Not more than 2 inches and be sure not to pile it around the trunk of the azalea as it may cause rot.
    

 If planted properly, azaleas are low maintenance. Azaleas need very little pruning. If you feel the need to shape them up a bit, you can do so after they are done blooming. Only taking off the leggiest branches and pinching back the tips will encourage fullness. Avoid late summer pruning as the evergreen varieties will be setting buds for the next growing season.  During dry weather, you may need to provide extra irrigation. Water your azalea deeply when you water so that the ground is soaked through the root system. You will also want to water well before the first hard freeze. Fertilize after blooming in the spring with a timed-release fertilizer. Never put lime on an azalea. 


  Most problems that arise with azaleas are due to poor soil, improper drainage or watering or aggressive pruning. If you are having issues with your azalea and none of these are a factor, there are a few other things that can cause problems for your azaleas, such as lace bugs. These are the most common pests that affect azaleas, causing yellowing foliage. You can usually find tiny black bugs on the underside of the leaves. This can be treated with insecticidal soap, available at most garden centers and farm supply stores.
Powdery mildew is another problem that can damage your azalea causing leaf drop. This is treated with fungicidal sprays.


Azaleas can offer up years of beauty and satisfaction for even the pickiest of plant connoisseurs. Once you decide on the best fit for your space and preferences just plant and enjoy.


For more interesting facts and information check out this book:


"American Azaleas"
By: L. Clarence Towe

Available on Google Books and Amazon


Happy Planting!!!

CONTAINER GARDENING SERIES : SQUASH, MELONS, CUCUMBERS (april)

Squash, Melons and Cucumbers 

Most people don't think of vining vegetables when they think of container gardens.
The biggest thing to remember is anything that vines like melons and squash and cucumbers need a lot of room to grow. But don't let that scare you into thinking you can't do it.  Start with a pot large enough to accommodate your vine. Then understand that your vine needs to spread. If you are limited on space, think vertical. Adding a trellis will allow your vine to grow upward. But, when the vines go up they are weighted down when they begin to fruit. You will need to fashion a system of slings to support larger fruit such as cantaloupe and watermelon.  Most squash and cucumbers will be fine. 
Mulch the top of the soil to retain moisture. Keep the soil moisture consistent. Don't allow it to dry too much for too long and then water or it could cause the fruit to split. The soil should be moist but allow to dry between watering, being sure to soak the soil until the excess drains out.

It is recommended that you use a container no less than 12 inches across per plant or 24 inches across per 2 plants. when adding your support you may use tomato cages that you have turned upside down and wired the "legs" together at the top or simple trellises. If you are using 2 containers you can fashion an arch between them out of rabbit wire and PVC pipe. It may be necessary to prune back some of the ends as they reach beyond their designated areas. However, you do not want to trim off any blooms as that will reduce your yield. Be sure you twist the vines around the support as they grow to keep them growing upward.
It is quite possible to grow enough for sharing or even freezing or canning. However, I wouldn't plan on preserving large quantities from a pot or two.
 Many plant lovers are joining the trend of container gardening as they move toward a more self-sufficient lifestyle. Who doesn't love the thought of eating organic vegetables without the cost that is so often associated with organics?
There is a peace of mind in knowing exactly where your fresh produce is coming from. Who knows, you may find yourself an avid container gardener before it is all said and done.

Thursday, February 27, 2020

SOIL APPLICATIONS

WHAT SOIL SHOULD I USE?

In a world full of bagged soils, each one claiming to be better than the next. You may be left in a cloud of dirt and confusion. After all, it's dirt. Why does it have to be so complicated?
Most people don't look at the ingredients of the bag. Again, it's dirt! Believe it or not, every soil that is marketed has a different set of ingredients that makes it good for some uses and maybe not so good for others. But, chances are you never thought about that. If its intended use is not in its title then most assume it's good for all things. The reality is, the names and titles are vague at best. Potting mix, potting soil, planting mix, garden soil, it all seems very ambiguous at best.

Here at the nursery, we have many different types of soil as well, but we want to take a moment to explain the difference so you can make an informed decision. There are many additives you can purchase to combine with existing soil to make it more hospitable for new plantings. Understanding your needs is key to making a great home for new roots.

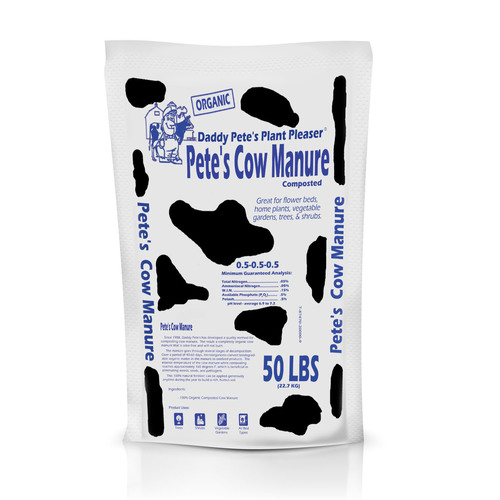
We carry Daddy Pete's soils and Jolly Gardener products as well.
Daddy Pete's is a local company and we try to support local as much as we can. Without local businesses, Mainstreet America will fade into the past. But, that's a blog for another time.

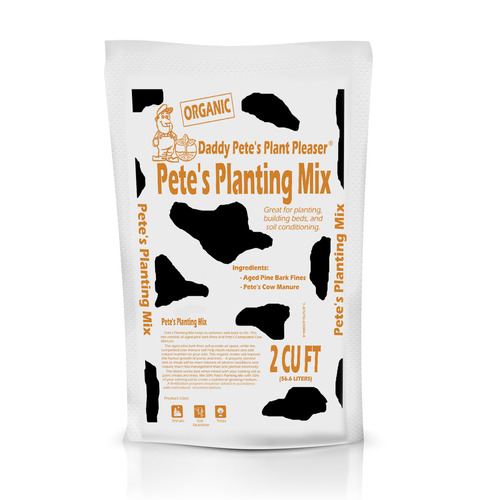
Planting Mix

Planting mix, generally speaking, is a mixture of composted cow manure and finely ground pine bark. The combination of this composted organic matter makes the soil very nutrient-rich so it is a superb choice for adding to the native soil when planting trees and shrubs or enriching the soil of a tired flower bed or garden spot. It also helps with drainage and water penetration.

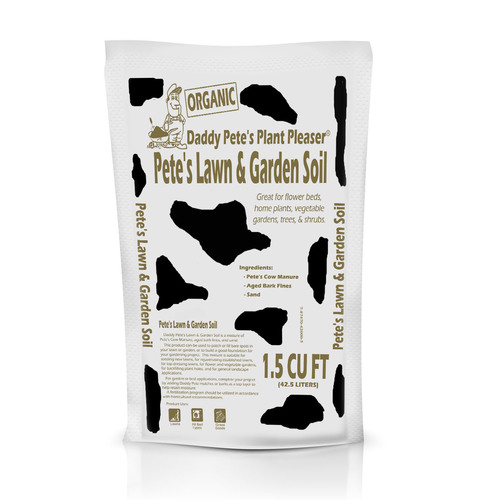
Lawn and Garden Soil

This is a combination of composted manure, finely ground pine bark, sand, and garden gypsum (calcium sulfate). This is a good choice for amending gardens and raised beds which may have exhausted the nutrients from the soil and need some revitalization.


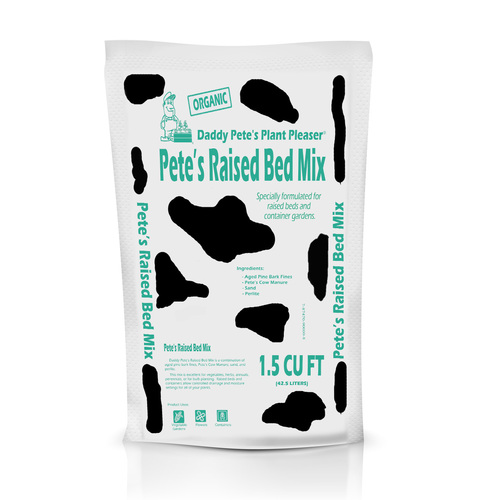
Raised Bed Mix

This is a well-balanced combination of composted cow manure, finely ground pine bark, sand, perlite, and gypsum (calcium sulfate). As the name says it is best used in raised beds and containers or vegetable gardens as it promotes good drainage and nutrients for good growth.

Moisture Mate* Planting Mix

Moisture Mate is a Jolly Gardener product that is used for containers. It contains polymer crystals that help to maintain moisture in containers. It also helps prevent over-watering with its superb drainage properties. Moisture Mate also contains timed release plant food that will feed your new plantings for up to four months.


Perlite
per·lite
/ˈpərlīt/noun
  1. a form of obsidian characterized by spherlulites formed by cracking of the volcanic glass during cooling, used as insulation or in plant growth media.

Perlite used as an additive helps to keep soil from becoming too compacted and aids in drainage.
While widely used as a soil amendment for planting, it has become popular as a stand-alone planting medium for hydroponic growing. acting as more of a support for the plants while keeping the tops of the plants relatively dry, thereby preventing rot.

Vermiculite
ver·mic·u·lite
/vərˈmikyəˌlīt/noun

  1. a yellow or brown mineral found as an alteration product of mica and other minerals, used for insulation or as a moisture-retentive medium for growing plants.

Vermiculite is widely used as an additive in soil because of its water retention properties. Making it supreme for plants that need a lot of moisture. You can purchase this separately to add to existing or native soil or you can purchase bagged soil that already has it added. Percentages of content can usually be found on the outside of the bag.


Peat Moss
Peat Moss is an organic decomposed moss with extremely good water retention properties. Peat moss is added to soil that has a high sand content so that it can aid in keeping the soil moist and loose. Most bagged soils have some percentage of peat moss added. check your ingredients. the higher the Sphagnum content, the more water that will be retained in your pot or area. Peat moss can be added to your native soil to keep it more workable for planting. 


Composted Cow manure

You really don't want to put fresh manure on a new bed or garden just before you plant but you can add it for the next season. However, you can buy composted cow manure by the bag and add it just before planting to act as a fertilizer for your plants. It is no secret that any composted organic matter makes your soil more nutrient-rich and gives your young plants the solid start they need.


In short, you can purchase bagged soils that already have what you need, or you can purchase additives to make your existing soil better. I recommend that very poor soil be amended with bagged soil when planting new shrubs and trees. and occasionally to beds and gardens. If you have already used some bagged soil in your area and just need to freshen it up, you can add a singular additive based on your needs. Or find the perfect combination for your plans. Either way, it is good practice to know what the needs of your plants are, then make your purchase based on that.  The key to successful gardening starts at ground level. Soil is key to plant health and crop abundance.
 Get in the dirt, good dirt looks rich and feels food to the fingers and the soul.

HAPPY GARDENING!


JUDY'S CHICKEN SALAD march

JUDY'S CHICKEN SALAD

Cook 4 boneless skinless chicken breasts.
Add salt to the water when boiling.

Drain and chop cooked chicken into small cubes
Add 1/4 cup of pickles (I prefer sweet pickles)
 2 Tbs. of mustard
1 cup of salad dressing mayo.
1/4 cup chopped celery- optional
2 boiled eggs chopped- optional

Mix well and chill.

This makes a large amount of chicken salad. Perfect for a gathering or pot luck dinner.


CONTAINER GARDENING SERIES : HERBS

CONTAINER GARDENING: HERBS


Herbs are becoming very popular for a myriad of reasons, ranging from culinary purposes to insect repellent and essential oils that can be rendered from the plants.
No matter what your reasons for buying herbs, they are a beautiful addition to even the smallest areas. Container gardening is a growing trend hitting urban America.
Herbs are the quintessential cure-all for what ails us. In this article, we will dive into the best herbs to grow individually and together to best suit your needs.

Insect Control

For insect control, we recommend any herb with a very pungent scent or anything with a citrus smell such as citronella, lemon thyme, lemon verbena, oregano, orange mint, lemon grass, catnip, lemon balm, lavender, bay laurel, rosemary, and dill. All of these possess some insect repelling properties. Citronella is often used in candles, oils, and even sprays that keep mosquitoes at bay while we are outside.
You should consider a mixed pot with about 3 different herbs to get the maximum effect. You could add citronella, lemon grass and rosemary for a nice combination of textures and aromas, or dill oregano and lemon balm. Use plants that complement each other, but have a powerful effect on the winged biters. I would never recommend insect-repelling plants to keep things away that are beneficial to our environment. So, please be mindful of the pollinators. If you are planting herbs for repelling insects please use them sparingly and only in your living or entertaining areas. Try not to place them where your pollinators will be repelled from nearby blossoms and blooms.

Italian Cooking

If you are like me, you never turn down a great Italian meal. Fresh herbs really bring out the flavors for these dishes. You can plant a pot combination for this purpose. Combine basil, thyme, and oregano for your tomato-based dishes or if you like Alfredo and wine sauces you could pair fennel, rosemary, and sage. I personally don't use extra sage in my Italian dishes that include Italian sausage, but to each their own and a kitchen is a laboratory experiment!


Chicken Recipes

If you eat a lot of chicken and are into all-natural and organic eating, then you may want to try these combinations for optimal flavor. Cilantro, rosemary, and garlic blend nicely for light grilled meals and tarragon, sage and thyme are great for baked or fried chicken. These look lovely together in a container as well.

Fish Recipes

Fish is such a delicate flavor you do not want to have herbs paired with it that will overpower its light flavor. A container with lemon balm, parsley, and dill will make quick work of a delicious meal for your family or if you fry your fish, you can season your batter or your sides with a combination of mint, chives, and basil.

Beef Recipes

For seasoning red meat, beef, pork, lamb, and venison, you may want to try a combination of chives, basil, and cilantro. Or, for a lighter taste, you may opt for parsley and garlic with rosemary. No matter what your preference you could easily grow these cook ready combinations to use and be the envy of the neighborhood or family.


Of course, if you eat veggies all the time you already know how important herbs can be in making your dishes very tasty. You can never go wrong with cilantro and dill in fresh salads or basil and garlic in your sauteed meals. Even if you are frying your vegetables, it's a delicious choice to add thyme, chives, and oregano.

Planting your combination planters according to your cooking habits will make it so easy to cut as you need or to dry in combination packs. Why pay big bucks for dried herbs when you can do it yourself?

Growing your insect repellent is much more cost-effective and visually pleasing. While a lot can be said of the oil burning tiki torches and the tabletop candles adding to the ambiance, nothing can compare to the natural aspect of live plants in your outdoor living spaces.

If you're growing your herbs simply because you have a deep-seated affection for the plants then any combination is fine, but I recommend lavender, eucalyptus, and lemon balm if your goal is simply aromatherapy and a love of all things natural.

Have fun building your combinations. Ultimately, the choice is yours.
HAPPY GARDENING!


Saturday, February 1, 2020

How to plan the perfect flower bed or vegetable garden


Planning for Planting

In the last few weeks of winter, we are more than ready to get on with spring. If you find yourself stuck in the house because it is simply just too cold to try to be outside right now you might want to sit down with a cup of hot cocoa and browse the internet for local plant nurseries. Once you find one, eh hem - " I hear King, North Carolina has one of the best around, just saying".  You should start to visualize your dream. Scope out your locations. Check out the available lighting in each place and begin to plan what you will put into each area. Note if the area is facing north, south, east, or west, paying attention to where the sun rises and sets. Also note if it is shaded by buildings or trees and has tree roots. Tree roots extend as far as the branches. It is helpful to draw it out on paper with measurements. You do not have to be an artist. It isn't like you are going to hang it in the local art gallery.

Trees and shrubs can still be planted now. Take advantage of warmer days to put them into the ground.

 Be sure to plan for blooms at different times throughout the season. Do not be tempted to plant an explosion of color. Your flower gardens will be more visually pleasing if you choose just a few colors and carry that theme throughout your entire landscape. Your vegetable gardens will produce better if you are mindful of the placement and lighting. For instance, you don't want your trellised beans to block the sun from your tomatoes and likewise, you don't want your tender lettuce in full sun, so you want to put this in the shadows of something larger.
 There is a myriad of apps available for download for IOS and ANDROID to help you along the way through the planning process.
INTO GARDENS
GARDEN PLAN PRO and
SMART PLANT
are just a few that have really captured my attention.
 Soon you will be able to hit your local garden center and begin to fill your spaces with plants and in no time you will have the beautiful blooms you have waited all winter to see once again.
I cannot stress enough that you can never measure too much. Lay your boundaries and measure, measure, measure. you don't want to get your garden too full. If you don't take the time to plan you can easily get too much going on and by the end of the season, things will look overgrown instead of lush and beautiful. Do some research on the plants you want. Make note of how tall and wide they will be at maturity and keep in mind that the width of a mature plant reflects your spacing between plants. For example, if your mature plant will reach 18 inches across, then you need to space your plants 18 inches apart.
SIMPLE FORMULA FOR SPACING
WIDTH OF PLANT 1  DIVIDED BY 2=
WIDTH OF PLANT 2 DIVIDED BY 2=                 ADD TOTALS TOGETHER FOR SPACING

Now you are ready.
As soon as the threat of frost has passed for your area you can start putting your gorgeous gardens together. Whether its vegetables or flowers, planning will make the planting go a lot quicker and smoother. It will eliminate the guesswork and prevent regret later.

I hope this helps a bit as we enter into the new planting season.
HAPPY GARDENING!